 |
| So pretty, and so easy! And ignore the blur on the left, it's my finger, or a ghostly presence if you prefer. I prefer the ghost, it implies that I know how to take pictures. I know, it's not a ghost, sigh. |
So after the success of last months Citrus love blog hop, I was all excited to get to this months. You know why? Well, the theme is chocolate, and for anyone who has been around here before, you may know that I love me some chocolate. I tend to mix it with weird things.
Bacon anyone? So it was fate that I had to make something.
Now I wanted to make something new to me, and I wanted it to be cute. I also wanted to be able to make it fast as I am slowly thinking about working out again. I said thinking people, I will commit soon. Or not, who knows.
 |
| My silicon pans, and I think I paid like $2 for each at a warehouse sale. I love sales. |
So when I saw
this on How Sweet it is. I knew I had to make it. The only thing is I hate dark chocolate, unless it is baked in a brownie or something, I don't like it. So I used regular chocolate. And by chocolate I mean candy melts, I have two 50 pound boxes of the things, so I better use it. ( I am not kidding, I have one of white and one of chocolate, and I am almost half way through both)
 |
| I know this is a lot of stuff to get together, but you know, for you I will try to make it work. |
Cake Batter Bark
How Sweet It Is
-white and milk chocolate candy melts
-2-3 TSPs white box cake mix
-sprinkles
 |
| Now I thought this would be perfect in my head, and well okay it worked fine, but some of the sprinkles were hard to see in the finished project. Next time I will do them upside down, so dark chocolate first, then white then sprinkles. |
I wanted to make these valentines like, you know, because I love you! (or I love me and I wanted more chocolate, who can really say) I used my heart silicone baking mold. I have a large one, a fancy one and a small one. So I used all three, because you can give a large one to a friend and eat a few small ones by your self.
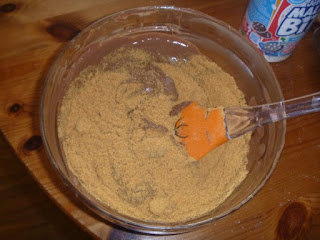
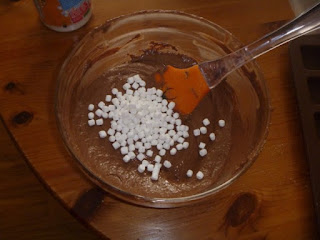
To start melt your white candy melts, I do this in the microwave at 30 second bursts. Then when fully melted mix in your cake batter until smooth and let it sit for a few seconds. I still had to add paraffin crystals, no matter what I do my white chocolate never melts nice. While it sits, take your molds and sprinkle in your sprinkles. I used small little hearts as they are the cutest and then a few larger ones to accent them. See I am getting all fancy on you here.
 |
| Chocolate and cake mix, and you can really taste the cake in it. I would know, I slopped a whole bunch on my hand and licked it off before I washed it. It was good! |
 |
| To fill my zip lock bag easier I put it in a cup. I will not use them again, either they were too cheap or I am just picky, but they were too hard to work with, flimsy and whatever, so I will splurge and use my 10 cent disposable piping bags. |
That's it people! Now I did not measure, as I never do, so you can sort of just go with the flow so to speak. if you are making a pan of it, go for a few cups of each, if you are going for a mold like me, you don't need as much.
So once you have sprinkled your pans. ( I know there is a dirty joke in there somewhere) take a disposable piping bag or a zip lock and fill it with the chocolate cake batter mix.
 |
| I had the hardest time cutting the tip off the bag was so flimsy, looking back I really should not try new things, stick with what you know. |
 |
| You don't have to be perfect, I mean I am anyway, but for this no worries, it will all work out. |
Snip off an end of the bag and carefully fill your molds just a little bit, not too much or your bark will be too thick. Then gently shake your molds, not too much, you don't want the sprinkles to move, but enough that the chocolate settles. Then pop them into the fridge to set. I found that if I put them in the freezer the two layers do not stick together well. That is what I did with my plate of left overs and it was a mess when I tried to break it up.
While they set melt your other chocolate and put it into a bag or whatever you are using. Once the first layer has hardened pull them out of the fridge then pipe on the chocolate, shake the mold a little to settle. Then back into the fridge and you let them fully set.
 |
| I had left overs so made some traditional bark, it fell apart so I had to eat it all myself, which really is a win for me actually. |
I made mine thin as I wanted them to be like the bark you make on a pan, but not in a pan, you know? You don't, well neither do I really.
When you are ready just pop them out of the mold and be amazed at the cuteness. Do it, be amazed!
Then for gift giving, you can pack them up however you like. I would suggest a jar or a cute little box for the small ones.
 |
| I so should have put some corny love label on them, like take one when you need a hug. Or something. I don't write cards, I just buy them, so I look like I have something smart to say. |
And a nice bag with a cute tag for the larger ones. Or if you are like me, you eat and hoard most of them, then put the left overs in sandwich bags and share with your work friends.
 |
| Okay, I hate that this is the better picture of them, ghost and all. |
Hope you enjoyed my super hard chocolate love recipe, I know it was complicated and all. But sometimes simple is best, and you know you want to make some right? Please visit the other blogs and hosts to see what awesomeness they have all come up with. Happy Chocolate Luv!
Here is a list of all the other great bloggers that are hosting with me this month, please check them out!


